Super Soft Sourdough English Muffins Recipe
These Sourdough English Muffins are soft, pillowy, and full of that signature tangy flavor. Perfect for breakfast, brunch, or even a quick snack!
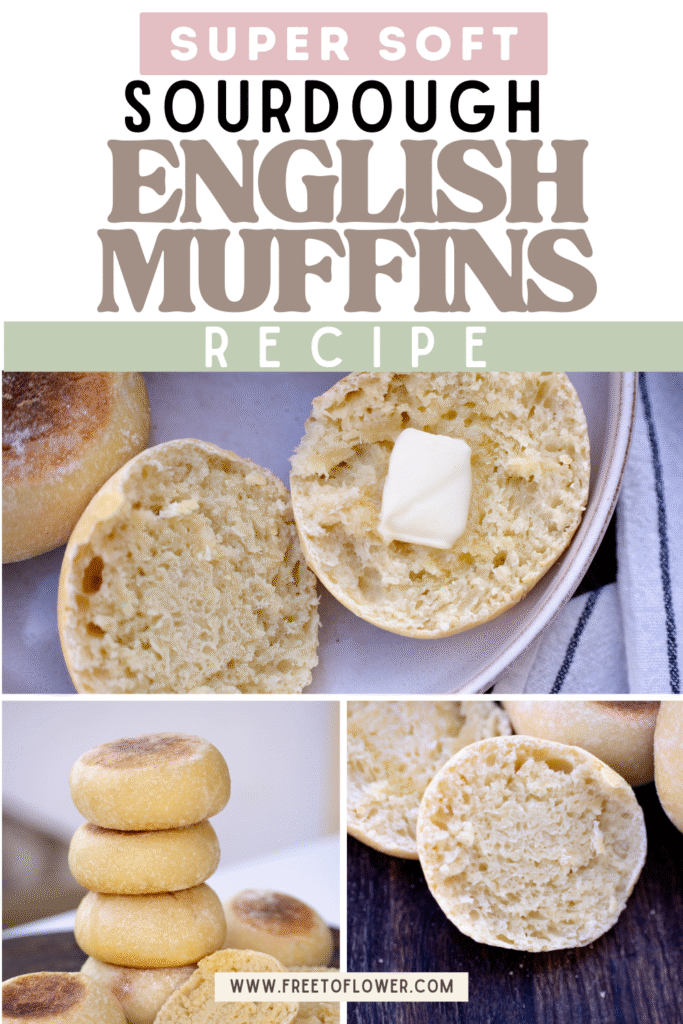
Homemade sourdough english muffins are one of those recipes I didn’t realize I was missing—until I made them. They’re surprisingly easy, fun to cook on the stovetop, and incredibly versatile. I’ll toast them up for eggs benedict, pack them into little sandwiches for the kids, or simply slather one with butter and jam. The best part? No oven required! Whether your oven is down or you just don’t feel like turning it on, you can still enjoy fresh sourdough goodness right from the skillet.

Why You’ll Love This Recipe
- No Oven Required – You can whip up these soft, tangy sourdough english muffins right on your stovetop—perfect when the oven’s out or just for a quicker bake.
- Perfectly Pillowy – Made with simple pantry staples and a bubbly sourdough starter, they develop that irresistibly soft texture that makes them ideal for eggs benedict or kid-friendly lunch sandwiches.
- Flexible Sourdough Option – Active starter gives a fluffier rise, but using discard works too—and it’s a great way to reduce waste. Need help with your starter? Check out this step‑by‑step guide to making your own sourdough starter
- Versatile Morning Treat – Nothing beats these sourdough english muffins as a cozy morning snack. Pair them with your favorite jam, or switch things up with a side of flavorful sourdough flatbreads or homemade discard granola for breakfast variety of your choice!
What You’ll Need
Tools

Instructions
- Mix the Dough: In a large bowl, stir together the sourdough starter, lukewarm milk, sugar, and melted butter until smooth. Add the flour and salt, mixing until a shaggy, sticky dough forms. Knead by hand (or in a stand mixer with a dough hook) for 2–3 minutes until the dough comes together—it should feel soft and slightly tacky.
- First Rise: Cover the bowl with a damp towel or plastic wrap. Let rise at room temperature (70–75°F) for 4–6 hours, until puffy and nearly doubled. For an overnight option, refrigerate after 2 hours and let it rest until the next day.
- Shape the Muffins: Turn the dough onto a lightly floured surface. Divide into 8 equal pieces (90–100g each). Roll into balls, then flatten into discs about 3½ inches wide and ¾-inch thick. Dust generously with cornmeal (or semolina/rice flour). Place on parchment, cover loosely, and let rise for 1–2 hours until puffy. You can also roll the dough and cut rounds with a biscuit cutter.
- Cook the Muffins: Heat a cast iron skillet (or heavy griddle) over medium-low. Cook 3–4 muffins at a time, 5–7 minutes per side, until golden brown and cooked through (internal temp 200°F). Adjust heat if browning too quickly.
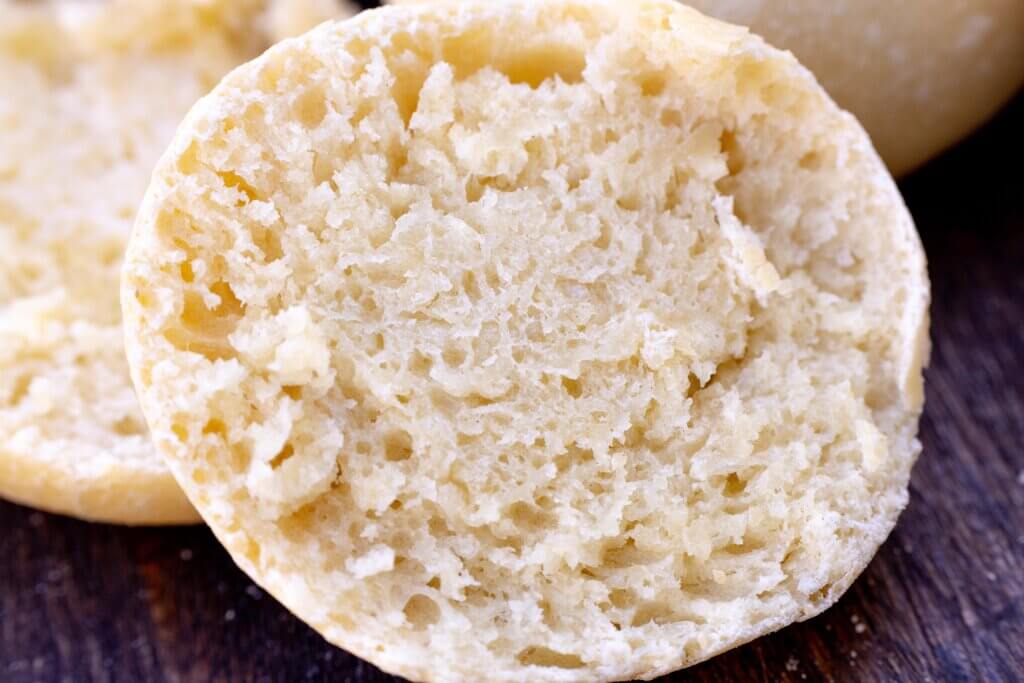
- Split and Serve: Once slightly cooled, split muffins with a fork (not a knife) to get those classic “nooks and crannies.” Toast and serve with butter, jam, or your favorite toppings.

Baker’s Schedule
Option 1: Same-Day (Morning → Afternoon)
- 7 AM – Mix dough
- 7 AM–12 PM – First rise (4–6 hrs)
- 12 PM – Shape muffins
- 12–2 PM – Second rise
- 2–2:30 PM – Cook
Ready by mid-afternoon
Option 2: Overnight (Evening → Morning)
- 6 PM (Day 1) – Mix & rise 2 hrs
- 8 PM – Refrigerate overnight
- 6–8 AM (Day 2) – Warm up & shape
- 8–10 AM – Second rise
- 10–10:30 AM – Cook
Ready for breakfast
FAQ
Tips
1. Starter Flexibility:
Active starter gives more rise, but discard works too (just expect a denser muffin).
2. Heat Control:
Low and slow cooking is key—use medium-low heat so the muffins cook through without burning.
3. Even Cooking:
Flatten the discs slightly before cooking for uniform rounds
Storage

Super Soft Sourdough English Muffins Recipe
Equipment
- Large mixing bowl
- Measuring cups & spoons (or a kitchen scale)
- Whisk or fork
- Wooden spoon or spatula
- Cast iron skillet (or heavy pan/griddle)
- Rolling Pin
- Biscuit cutter (optional)
Ingredients
- 1 cup 240g active sourdough starter or discard
- 1 cup 240g whole milk, lukewarm
- 2 tbsp 25g sugar
- 2¾ cups 330g all-purpose or bread flour
- ½ tsp 3g salt
- 1 tbsp 14g unsalted butter, melted
- Cornmeal/semolina/rice flour for dusting
Instructions
- Mix the Dough: In a large bowl, stir together the sourdough starter, lukewarm milk, sugar, and melted butter until smooth. Add the flour and salt, mixing until a shaggy, sticky dough forms. Knead by hand (or in a stand mixer with a dough hook) for 2–3 minutes until the dough comes together—it should feel soft and slightly tacky.
- First Rise: Cover the bowl with a damp towel or plastic wrap. Let rise at room temperature (70–75°F) for 4–6 hours, until puffy and nearly doubled. For an overnight option, refrigerate after 2 hours and let it rest until the next day.
- Shape the Muffins: Turn the dough onto a lightly floured surface. Divide into 8 equal pieces (90–100g each). Roll into balls, then flatten into discs about 3½ inches wide and ¾-inch thick. Dust generously with cornmeal (or semolina/rice flour). Place on parchment, cover loosely, and let rise for 1–2 hours until puffy. You can also roll the dough and cut rounds with a biscuit cutter.
- Cook the Muffins: Heat a cast iron skillet (or heavy griddle) over medium-low. Cook 3–4 muffins at a time, 5–7 minutes per side, until golden brown and cooked through (internal temp 200°F). Adjust heat if browning too quickly.
- Split and Serve: Once slightly cooled, split muffins with a fork (not a knife) to get those classic “nooks and crannies.” Toast and serve with butter, jam, or your favorite toppings.
Notes
Tips
- Starter Flexibility: Active starter gives more rise, but discard works too (just expect a denser muffin).
- Heat Control: Low and slow cooking is key—use medium-low heat so the muffins cook through without burning.
- Even Cooking: Flatten the discs slightly before cooking for uniform rounds.
- Room Temperature (1–2 Days): Keep cooled muffins in an airtight container or wrapped tightly at room temp for up to 2 days.
- Refrigerator (Up to 1 Week): Store in an airtight bag or container to keep them soft longer. Toast before serving for best texture.
- Freezer (2–3 Months): Wrap individually, then place in a freezer bag. Thaw at room temp or toast straight from frozen.


This article may contain affiliate links, which means I make a small commission at no extra cost to you. As an Amazon Associate, I earn from qualifying purchases at no extra cost to you. You can read the full disclosure policy.