How to Make Apple Cider Vinegar from Apple Scraps
How to Make Apple Cider Vinegar from Apple Scraps with simple ingredients and easy steps. Enjoy homemade ACV in your dishes and drinks!

We love to use apple cider vinegar in salad dressings, and in our morning glass of water. It's a staple around here. I used to always be so annoyed when our ACV would run out and I'd have to run to the store to grab more. Then one year, we had an overwhelming harvest of apples, and I knew I had to get creative.
That's when I decided to try making apple cider vinegar for the first time. It turned out to be an immediate hit in our house. It's so easy to make, and I love that it's not only delicious but also something I can cross off the grocery list.
This recipe is a great way to use up apple scraps, like peels and cores, instead of throwing them away. There's just something about knowing I made it myself that makes it feel even more special. Now, whenever we run low, I'm no longer worried about running out because I know I can just make more at home.

Why You'll Love This Recipe
Turns apple scraps into something useful
Making your own apple cider vinegar is a fantastic way to use up apple scraps like peels and cores that would usually just get tossed. Instead of throwing them away, you're turning them into something you'll actually use. It feels good to save money and skip buying the store-bought stuff. Plus, there's something really fun about knowing you made it yourself. The whole process is easy and makes you feel more connected to what's in your kitchen.
A Handy Pantry Staple
Homemade apple cider vinegar doesn't just taste good-it's a satisfying thing to make from scratch. The fermentation process develops a tangy, complex flavor and a cloudy "mother" that forms naturally as the vinegar matures. And when you start with organic apples, you know exactly what's in your vinegar. Over time, the flavor develops into that perfect tanginess, and it's great to know your vinegar is fresh and free of anything extra.
Brings you into the process
Making your own ACV is kind of like a fun science project. Watching the fermentation happen-seeing those first bubbles from wild yeast, then the vinegar mother forming-is really rewarding. Each batch reminds you that good things take time. Whether you're using leftovers from apple harvests or scraps from your everyday snacks, it feels personal, like you're turning something small into something amazing.
Saves you from store-bought options
Making your own apple cider vinegar means you can skip all the store-bought options that are full of preservatives and additives. You'll know exactly what's in your vinegar, and you can even adjust the flavor to your liking. Whether you like a stronger tang or something a little milder, you've got full control over the final product. It's a great way to enjoy natural, pure vinegar without any mystery ingredients.

Instructions
- Clean your jar and all utensils well
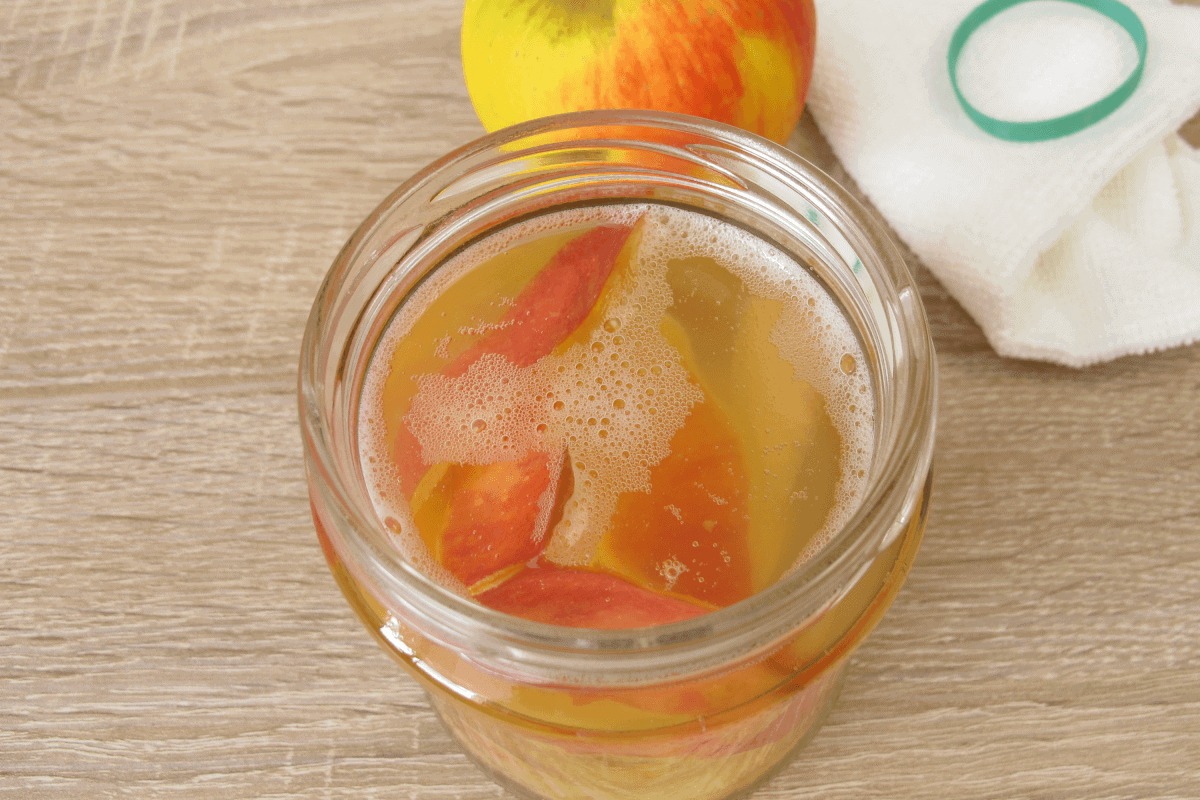
- Fill your jar ½-¾ of the way up with apple pieces/scraps
- In a separate container, stir together water & sugar until the sugar dissolves.
- Pour over the apples, until they are completely covered.
- Leave about 1 inch of headspace at the top.
- Cover with a kitchen towel/scrap fabric and secure tightly with a rubber band.
- Sit in a warm dark place for 2 weeks, stirring every few days.
- Examine your ACV - if it has a pleasant smell already, you can discard the apple pieces. If it still seems to mostly be water with some apple, leave for another 2 weeks.
- Strain apple pieces out, and allow the liquid to sit for about another 4 weeks. When your ACV has the classic vinegary taste, it's ready! Leave it to stand until that point. The times can vary.
- When you're happy with your vinegar taste, store in the fridge for as long as you'd like.

FAQ

10 Tips TO Keep Top of Mind When Making Apple Cider Vinegar
1. Start with clean jars and utensils:
Make sure your jars, whether a quart jar or something bigger, and tools are clean so you don't accidentally introduce anything that could mess with the fermentation process. If you have a pickle pipe, that's a great option to seal your jar while still letting gases escape.
2. Pick the right apples:
If you can, go for organic or heirloom apples, as they're free of pesticides, which helps the fermentation work better. If you have apple trees in your yard, that's even better! Fresh apples from your own trees make the best vinegar. Next time, you might want to try using a variety of different kinds of apples to see what flavor you prefer.
3. Use filtered water:
Skip the tap water because the chlorine can mess with the fermentation process. Instead, use filtered water from a pitcher or any clean container to ensure the fermentation works properly.
4. Sugar swap:
You can totally mix it up and use brown sugar instead of white sugar for a richer flavor. For your sugar water, add about 1 cup of sugar to 4 cups of water and stir until dissolved. Don't be afraid to try different sugars or apples until you find the combo you love.
5. Cover to keep fruit flies out:
Use a coffee filter or fabric to cover the top of the jar, securing it with a rubber band. This keeps pesky fruit flies out while allowing your vinegar to ferment properly, especially during the first week. If you notice any unwanted critters, just make sure the fabric stays in place.
6. Find the right spot for it:
Set your jar somewhere at room temperature, but keep it out of direct sunlight. This is the sweet spot for letting the fermentation process work its magic. After a few days, you'll start seeing carbon dioxide bubbles. That's your sign that things are moving along.
7. Stir often:
Give it a stir every few days to keep things moving. After about two weeks, check the smell. If it's nice and tangy, strain out the apple pieces. If it still smells more like apples than vinegar, let it sit for another couple of weeks.
8. Give it time:
After straining out the apple pieces, let the liquid sit for another 4 weeks. Your vinegar will develop its classic taste over time, so don't rush it! The final product might take a little longer than expected, and that's totally fine. If you want to speed things up, try using fresh apple juice as part of your mixture for a head start.
9. Watch the magic happen:
The mother of vinegar is a key part of the process. It's a naturally formed culture that develops at the surface of the liquid and signals that the vinegar is on track. It's one of the best ways to know your apple cider vinegar is heading in the right direction.
10. Have fun experimenting:
Feel free to try different ways of mixing up your ingredients, like using raw honey instead of sugar. The beauty of it is you can make it your own! Whether you're using raw apple cider vinegar for salad dressings, marinades, pickling, or adding a splash to your favorite recipes, the possibilities are endless.
11. Enjoy the benefits:
Homemade apple cider vinegar has so many uses beyond the kitchen. From salad dressings to a simple drink with raw apple cider vinegar and water, it's a versatile staple. Plus, knowing the benefits of apple cider vinegar and how to make it yourself just feels great.
Storage
📖 Recipe
How to Make Apple Cider Vinegar from Apple Scraps
Ingredients
- apples or apple scraps
- 1 gallon jar
- 1 tbs sugar
- 1 cup filtered water
Instructions
- Clean your jar and all utensils well1 gallon jar
- Fill your jar ½-¾ of the way up with apple pieces/scrapsapples
- In a separate container, stir together water & sugar until the sugar dissolves.1 tbs sugar, 1 cup filtered water
- Pour over the apples, until they are completely covered.
- Leave about 1 inch of headspace at the top.
- Cover with a kitchen towel/scrap fabric and secure tightly with a rubber band.
- Sit in a warm dark place for 2 weeks, stirring every few days.
- Examine your ACV - if it has a pleasant smell already, you can discard the apple pieces. If it still seems to mostly be water with some apple, leave for another 2 weeks.
- Strain apple pieces out, and allow the liquid to sit for about another 4 weeks. When your ACV has the classic vinegary taste, it's ready! Leave it to stand until that point. The times can vary.
- When you're happy with your vinegar taste, store in the fridge for as long as you'd like.
Notes
10 Tips TO Keep Top of Mind When Making Apple Cider Vinegar
- Start with clean jars and utensils: Make sure your jars, whether a quart jar or something bigger, and tools are clean so you don't accidentally introduce anything that could mess with the fermentation process. If you have a pickle pipe, that's a great option to seal your jar while still letting gases escape.
- Pick the right apples: If you can, go for organic or heirloom apples, as they're free of pesticides, which helps the fermentation work better. If you have apple trees in your yard, that's even better! Fresh apples from your own trees make the best vinegar. Next time, you might want to try using a variety of different kinds of apples to see what flavor you prefer.
- Use filtered water: Skip the tap water because the chlorine can mess with the fermentation process. Instead, use filtered water from a pitcher or any clean container to ensure the fermentation works properly.
- Sugar swap: You can totally mix it up and use brown sugar instead of white sugar for a richer flavor. For your sugar water, add about 1 cup of sugar to 4 cups of water and stir until dissolved. Don't be afraid to try different sugars or apples until you find the combo you love.
- Cover to keep fruit flies out:Use a coffee filter or fabric to cover the top of the jar, securing it with a rubber band. This keeps pesky fruit flies out while allowing your vinegar to ferment properly, especially during the first week. If you notice any unwanted critters, just make sure the fabric stays in place.
- Find the right spot for it: Set your jar somewhere at room temperature, but keep it out of direct sunlight. This is the sweet spot for letting the fermentation process work its magic. After a few days, you'll start seeing carbon dioxide bubbles. That's your sign that things are moving along.
- Stir often: Give it a stir every few days to keep things moving. After about two weeks, check the smell. If it's nice and tangy, strain out the apple pieces. If it still smells more like apples than vinegar, let it sit for another couple of weeks.
- Give it time: After straining out the apple pieces, let the liquid sit for another 4 weeks. Your vinegar will develop its classic taste over time, so don't rush it! The final product might take a little longer than expected, and that's totally fine. If you want to speed things up, try using fresh apple juice as part of your mixture for a head start.
- Watch the magic happen: The mother of vinegar is a key part of the process. It's a naturally formed culture that develops at the surface of the liquid and signals that the vinegar is on track. It's one of the best ways to know your apple cider vinegar is heading in the right direction.
- Have fun experimenting: Feel free to try different ways of mixing up your ingredients, like using raw honey instead of sugar or even adding a bottle of wine for a unique twist. The beauty of it is you can make it your own! Whether you're using raw apple cider vinegar for cooking or for health benefits like weight loss and balancing blood sugar, the possibilities are endless.
- Enjoy the benefits: Homemade apple cider vinegar has so many uses beyond the kitchen. From salad dressings to a simple drink with raw apple cider vinegar and water, it's a versatile staple. Plus, knowing the benefits of apple cider vinegar and how to make it yourself just feels great.
Storage
- Refrigeration: Once your apple cider vinegar is ready, store it in the fridge to keep it fresh and maintain its flavor. Just be sure to use an airtight container to prevent contamination.
- Freezing: Freezing isn't necessary for apple cider vinegar. The natural acidity and fermentation process help it stay stable for a long time at room temperature or in the fridge. Freezing could change the flavor and texture, so it's best to keep it refrigerated.
- Reheating and Thawing: Since apple cider vinegar doesn't need to be reheated, you can use it straight from the fridge whenever you need it.


Comments
No Comments