Anti-Inflammatory Homemade Chicken Bone Broth Recipe
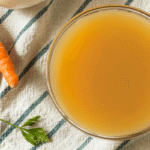
Anti-inflammatory bone broth recipe Boost your gut health with this soothing, homemade chicken bone broth packed with healing properties.
Servings 10
Calories 6kcal
Equipment
Ingredients
- Chicken bones & drippings from a roast chicken
- 2 Carrots
- 1 inch of Fresh Ginger root
- 1 inch of fresh Turmeric root or 2 teaspoon turmeric root powder
- Bay leaf
- Any other root vegetables you have on hand celery root, parsley root, beets
- Whole peppercorns
- Filtered water
- 1 tbs apple cider vinegar
Instructions
- Pick all the chicken meat off the chicken bones. Add the bones & pan drippings to a large pot.Chicken bones & drippings from a roast chicken
- Fill a pot with filtered water.Filtered water
- Add in the peeled, whole carrots, ginger & turmeric roots, and any other root vegetables that you have on hand, as well as the bay leaf, peppercorns, and apple cider vinegar2 Carrots, 1 inch of Fresh Ginger root, Bay leaf, Whole peppercorns, 1 tbs apple cider vinegar
- Bring to a boil, then turn down to a low simmer.
- Simmer on low for 12–24 hours.
- When done, broth should smell amazing, and have a richly dark color.
- Strain through a metal strainer, and store in the fridge until ready to use.
- You can drink the broth as is, or make it into a hearty chicken soup
Notes
Tips for Making Anti-Inflammatory Homemade Chicken Bone Broth
- Simmer long and slow: To extract the maximum flavor and nutrients, simmer the broth on low heat for 12–24 hours. This slow-cooking process ensures the broth is rich and packed with healing properties.
- Make sure to use enough water to cover the bones and vegetables throughout the cooking time.
- Adjust to your taste: Feel free to experiment with additional root vegetables and spices based on what you have available. This not only boosts the nutritional value but also allows you to customize the broth to your flavor preferences.
- Don’t skip on the apple cider vinegar: Adding apple cider vinegar helps to extract minerals from the bones, making the broth more nutrient-dense.
Storage
- Airtight Containers: Once your broth is strained and cooled, store it in clean, airtight glass containers like mason jars. This prevents exposure to air and maintains the broth’s flavor and freshness.
- Cool, dark place: Keep the containers in the fridge or a cool, dark cupboard away from direct sunlight and heat sources. This helps to preserve the broth’s quality and prevents spoilage.
- Labeling: Label each container with the date and contents. This makes it easy to track how long the broth has been stored and ensures you use it within its optimal timeframe.
- Avoiding moisture: Ensure that the containers are completely dry before filling them with broth. Moisture can lead to spoilage, so keeping the storage environment dry is crucial.
- Freezer Storage: For long-term storage, consider freezing the broth. Use airtight containers or vacuum-sealed bags to keep it fresh for extended periods. This method is particularly useful if you make large batches.
- Portioning: If you freeze the broth, consider portioning it into smaller amounts for easy use. This way, you can thaw only what you need without having to defrost the entire batch.
- Avoiding Contamination: Use clean utensils when handling the broth to avoid introducing any contaminants that could spoil it.
Nutrition
Serving: 1g | Calories: 6kcal | Carbohydrates: 1g | Protein: 0.1g | Fat: 0.03g | Saturated Fat: 0.01g | Polyunsaturated Fat: 0.01g | Monounsaturated Fat: 0.002g | Sodium: 9mg | Potassium: 43mg | Fiber: 0.4g | Sugar: 1g | Vitamin A: 2038IU | Vitamin C: 1mg | Calcium: 4mg | Iron: 0.05mg
