How to Render Beef Suet and make into Tallow
How to render beef suet: Learn the easy process to turn beef suet into versatile tallow for cooking, candle making, soap, and skincare projects.
Equipment
- Large Pot
- metal mesh strainer
- large metal bowl
- freezer bags
Ingredients
- beef suet
- water
- salt
Instructions
- Prep the suet: Cut your pieces of suet into small cubes. Discard any impurities or pieces of meat that may still be attached to the suet.beef suet
- Add all your cut up fat trimmings into a large pot.
- Pour filtered water over the suet. The amount depends on the amount of fat you're rendering, as well as the size of the pot. The water level should come up about ¼ of the way up in the pot.water
- Add about 2tbs of salt, and mix everything thoroughly.salt
- Bring to a simmer, then turn heat down. You want the mixture to be hot and simmering lightly, but not actively boiling.
- Leave on light simmer for 4-8hours, until most of the fat melts.
- Extract any unmelted chunks with a slotted spoon. Then, pour the tallow into a metal strainer lined with a cheese cloth, on top of a large metal bowl.
- Allow to strain through. Then, cover the metal bowl with plastic wrap and set it the fridge to harden up, for about 5 hours.
- When hard, press on the sides of the metal bowl and the top layer of rendered tallow will pop up in a single piece. Discard any water & impurities left below.
- Add tallow to a large pot, cover with filtered water and repeat the entire process again for second rendering.
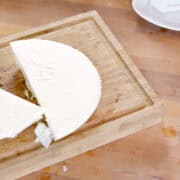
- Once done, your tallow should be white and odorless. If not, repeat the process one more time.
- Place in an airtight container or ziplock bags until you're ready to use the tallow for cooking or other DIY projects.
Notes
Tips
- Start with Cold Suet: Keep the suet cold or partially frozen rather than room temperature, to make it easier to handle and cut into smaller pieces.
- Remove Any Meat and Connective Tissue: Trim off any meat, blood spots, and connective tissue from the suet to ensure a clean, pure tallow.
- Cut into Small Pieces or Grind: Cut the suet into small pieces or use a meat grinder to break it down. Smaller pieces render more efficiently.
- Use Low Heat: Render the suet over low heat to prevent burning and ensure a smooth, clean tallow. A slow cooker or a heavy-bottomed pot on the stovetop works well.
- Add Water Initially: Add a small amount of water to the pot at the beginning of the rendering process to prevent the suet from burning before it starts to melt.
- Stir Occasionally: Stir the suet occasionally to help it melt evenly and to prevent sticking or burning on the bottom of the pot.
- Strain Thoroughly: Once the suet has completely melted, strain the liquid tallow through a fine mesh strainer or cheesecloth to remove any remaining solids.
- Store Properly: Pour the strained tallow into clean, dry jars or containers and let it cool completely before sealing. Store in the refrigerator or a cool, dark place.
- Use for Various Projects: Rendered tallow can be used for cooking, making candles, soap, and skincare products. Be sure to keep it pure if you plan to use it for skincare.
- Work in Batches: If you have a large amount of suet, work in batches to avoid overcrowding the pot, which can prevent even rendering.
- Keep an Eye on Temperature: Maintain a steady, low temperature throughout the process to ensure the tallow doesn’t scorch and retains its quality.
Storage
Refrigeration:- Method: Store the tallow in airtight containers or jars in the refrigerator.
- Duration: Can last up to a year or more.
- Best For: Longer shelf life and maintaining freshness.
- Method: Pour the cooled tallow into ice cube trays, freeze until solid, then transfer to freezer-safe bags or containers.
- Duration: Can last for several years.
- Best For: Long-term storage and easy portioning for future use.
- Method: Use a vacuum sealer to remove air and seal the tallow in vacuum bags.
- Duration: Can last up to several years if kept in the freezer.
- Best For: Maximum shelf life and prevention of freezer burn.
- Method: Store small amounts of tallow in smaller jars or containers for easy daily access.
- Duration: Follow the storage guidelines for room temperature or refrigeration based on your needs.
- Best For: Convenience and minimizing exposure to air and contaminants.
- Method: Regardless of storage method, always label and date your containers to keep track of freshness and use older tallow first.
- Best For: Efficient rotation and ensuring you use the freshest tallow.
